Start at a low volume when powering on, then gradually increase.
This device easily produces feedback with speakers and headphones; avoid harsh high frequencies.
Store and use in a dry place, away from moisture.
Do not directly feed modular synthesizer or other high-level signals.
Thank you for purchasing Wingie2!
Wingie2 is a handheld stereo resonator with a built-in microphone. It can instantly interact with your voice and the surrounding environment, connect to other devices, or serve as a development platform. Lightweight and portable, it lets you create music and explore sound anywhere.
Wingie2 is powered via a USB Type-C port. You can use a charger or a power bank. The first batch of Wingie2 (produced before May 2022, with no screws on the back) cannot use C-C cables; use A-C cables only.
If you hear digital noise in the output, try a different power supply or a ground-loop isolator.
After connecting power, there is about a 3-second fade-in from silence to full volume.
2. Audio Input / Output
Audio Input
Wingie2's sensitive microphone picks up airborne sound and easily produces feedback with speakers. You can play the feedback. The v4 firmware (which includes the fifth Ratio Mode) has a built-in anti-feedback function: feedback can still build up, but distortion is greatly reduced, yielding a softer tone. To avoid feedback, use headphones and control the volume to prevent headphone feedback.
You can use Wingie2 to listen to nearby sounds, treat it as a percussion instrument, or use it to turn any object into an instrument. Experiment freely.
Wingie2's audio input is a stereo 3.5mm jack (TRS). Line input can be stereo or mono: in mono, the left and right line signals are mixed into one track and fed to both resonators. The microphone is unaffected and stays stereo. Hold C on both note keyboards at startup to toggle stereo/mono; the change is written to flash immediately. The same setting is available as "Line Input" in USB Web Configuration (live change; Save writes flash). Factory default is stereo.
Note: Avoid excessive input signals. An overly large input signal causes the overloaded acoustic sound to appear in the output. If you can still hear the line-input signal when the source switch is set to microphone, or when the dry/wet ratio is set to 100%, the line-input signal is too high. Turn down the input signal level (not the faders on Wingie2).
Audio Output
Wingie2's audio output is a stereo 3.5mm jack (TRS). It can directly drive headphones.
3. Panel Controls
The control functions are labeled on Wingie2.
Both Mix and Volume control the signal strength before the resonator. This design allows the resonator's decay tail to be heard in full.
When both channels share the same octave setting, the right channel sounds one octave higher than the left.
Fader
Function
Mix
Dry/wet ratio
Decay
Resonator decay time, from 0.1s to 10s; MPE pressure can add on top of the fader position (see Chapter 10)
Volume
Input volume
4. Modes
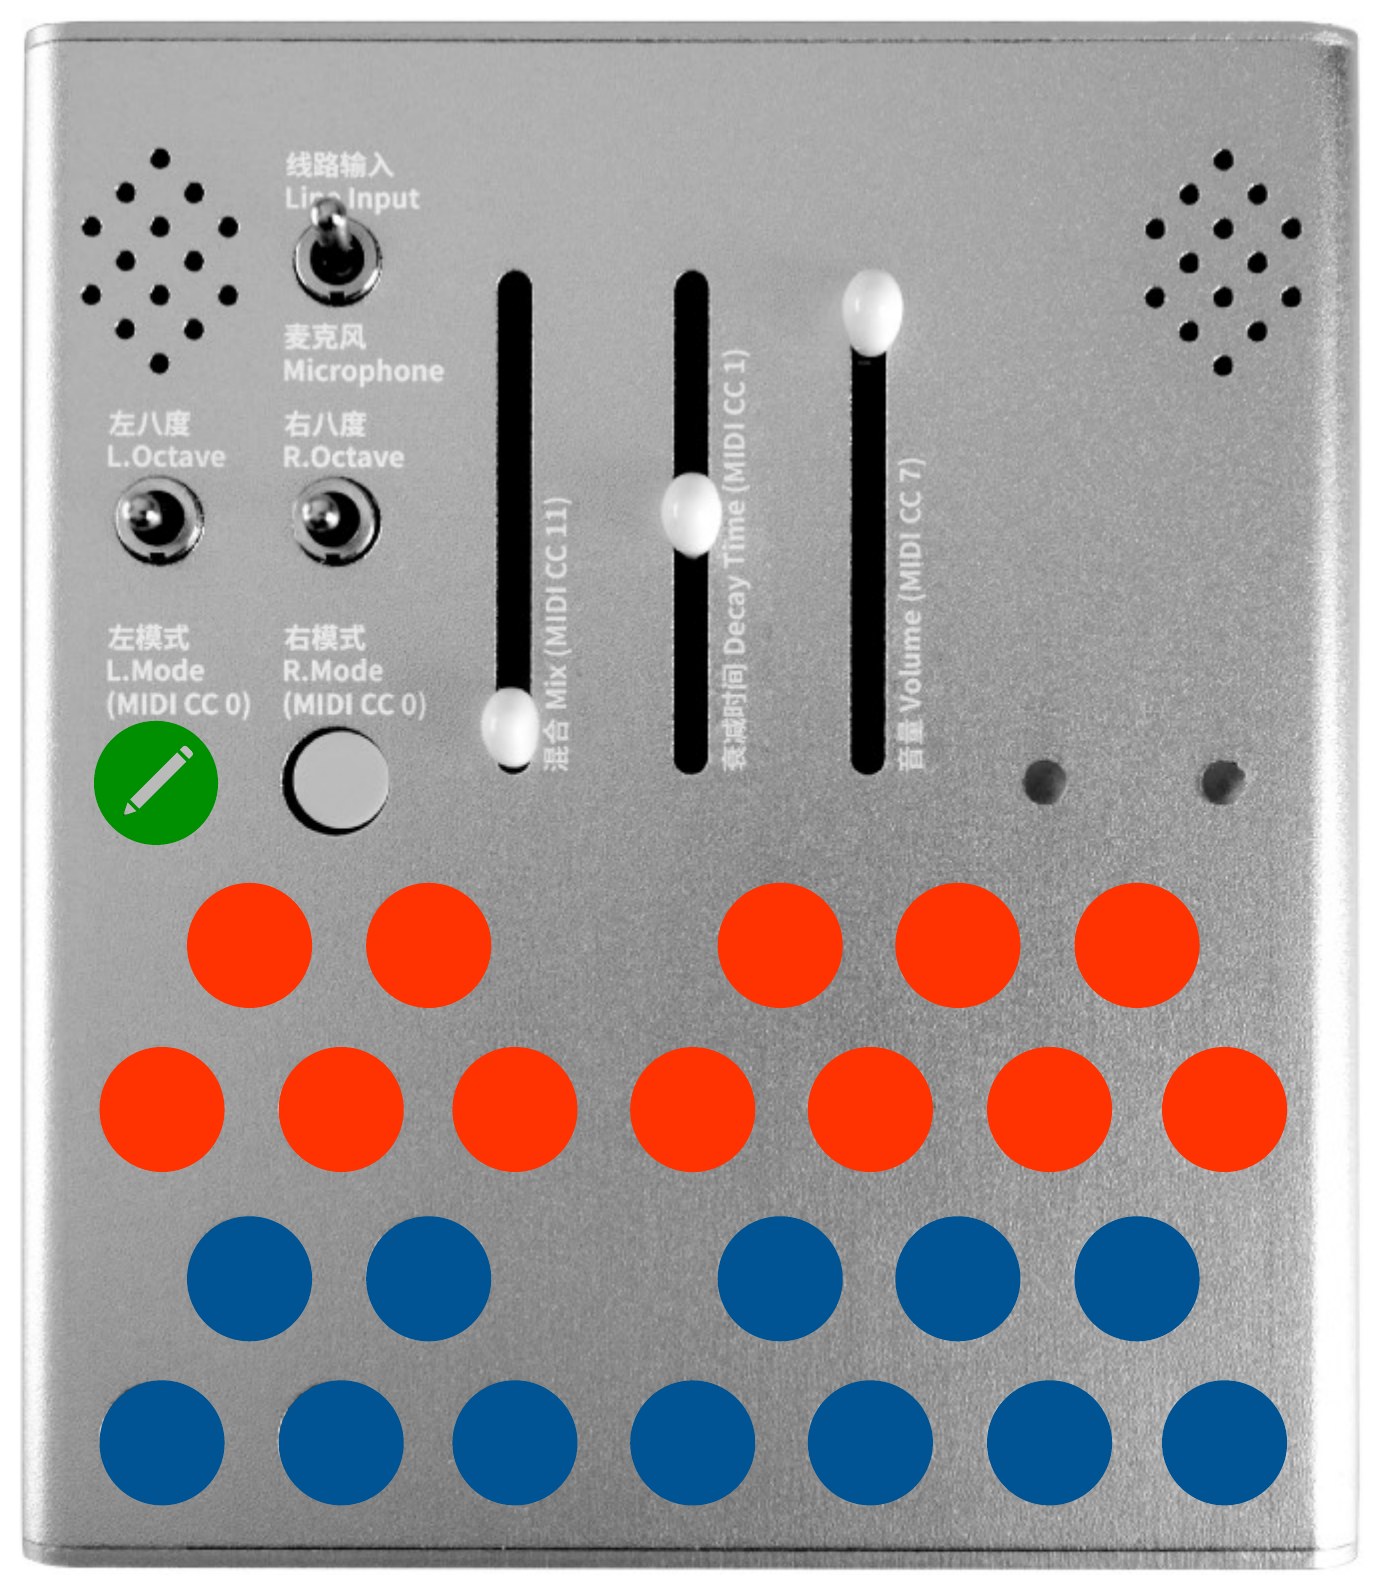
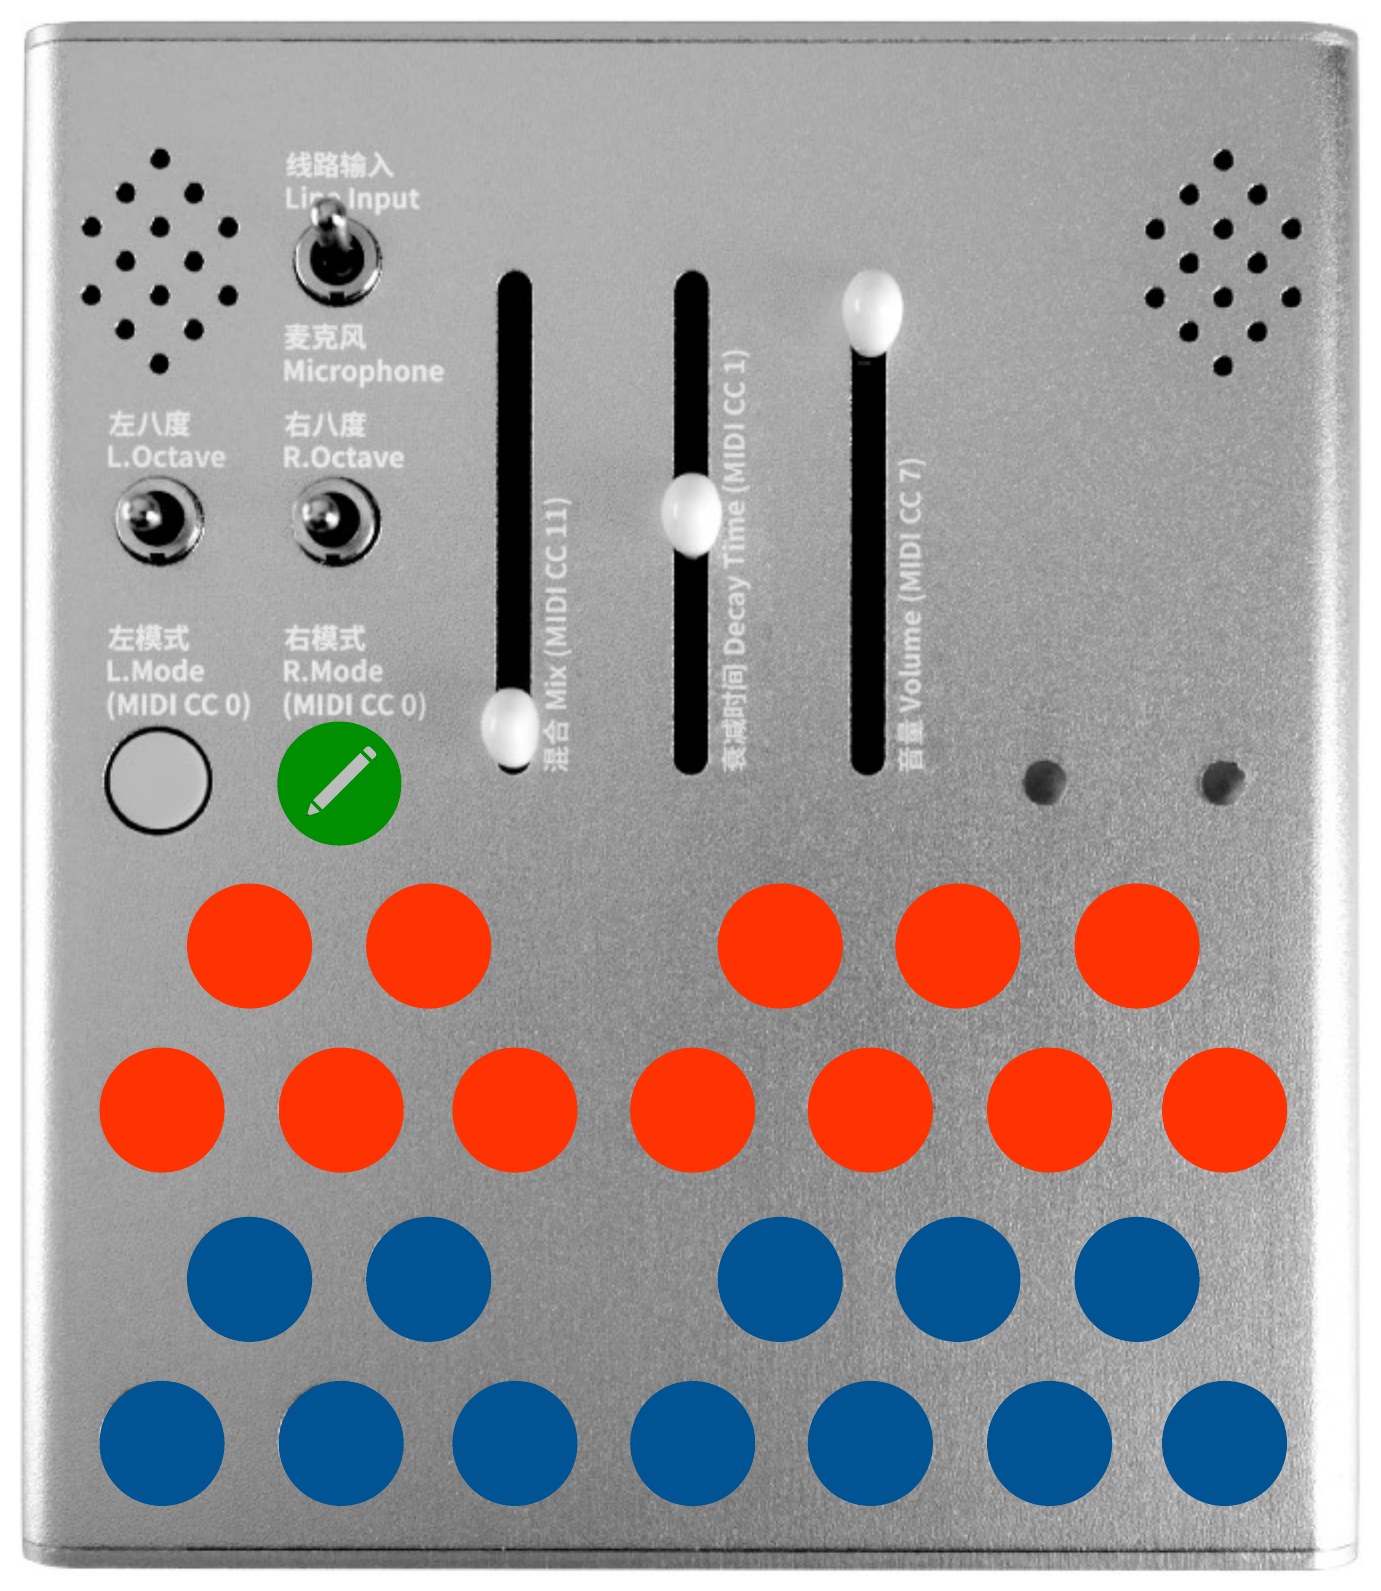
Wingie2 has five modes, cycled by pressing the Mode button. The current mode is shown by the LED.
Mode
Polyphony
Note keyboard
Octave switch response
LED
Poly (white)
3-voice
Buttons cycle through each voice
Affects the next note played. You can switch octaves before playing a note to mix notes of different octaves.
White
String (yellow)
monophonic
Press multiple note buttons simultaneously to set a sequence; the sequence advances each time the input volume exceeds the threshold
Buttons cycle through each voice; resonator frequency = fundamental × ratio
Affects the next note played
white/yellow alternating
Global tuning affects all five modes: Poly, String, Bar, Cave, and Ratio. (Factory default A3 (69) = 440 Hz.) For global tuning, see Chapter 13.
Ratio Mode
Ratio Mode is the fifth mode, new in v4. Unlike Poly/String/Bar, which stack by octaves, Ratio Mode sets each resonator's frequency to fundamental × ratio, enabling non-octave resonant relationships.
3-voice polyphony: The 9 resonators are divided into three Voices (Voice 1 uses resonators 1/2/3, Voice 2 uses 4/5/6, Voice 3 uses 7/8/9). Each note press occupies one voice; when all three are active, the oldest is replaced.
Shared ratio profile: Both channels share the same 9 ratios; only the fundamental (octave) differs. Factory ratios are 1 / 2 / 3 / 4 / 5 / 6 / 7 / 8 / 9.
Ratio range: 0.125 to 32.0, step 0.001. Frequencies are clamped to 16.00–16000.00 Hz. Ratios are adjusted via USB Web Configuration or MIDI.
There are three ways to enter Ratio Mode:
Panel button: After Poly → String → Bar → Cave, press once more to enter Ratio Mode (the 5th press).
MIDI: CC 0 value 103–127.
USB Web Configuration: Select "Ratio" in the left/right Mode dropdown.
5. Custom Caves
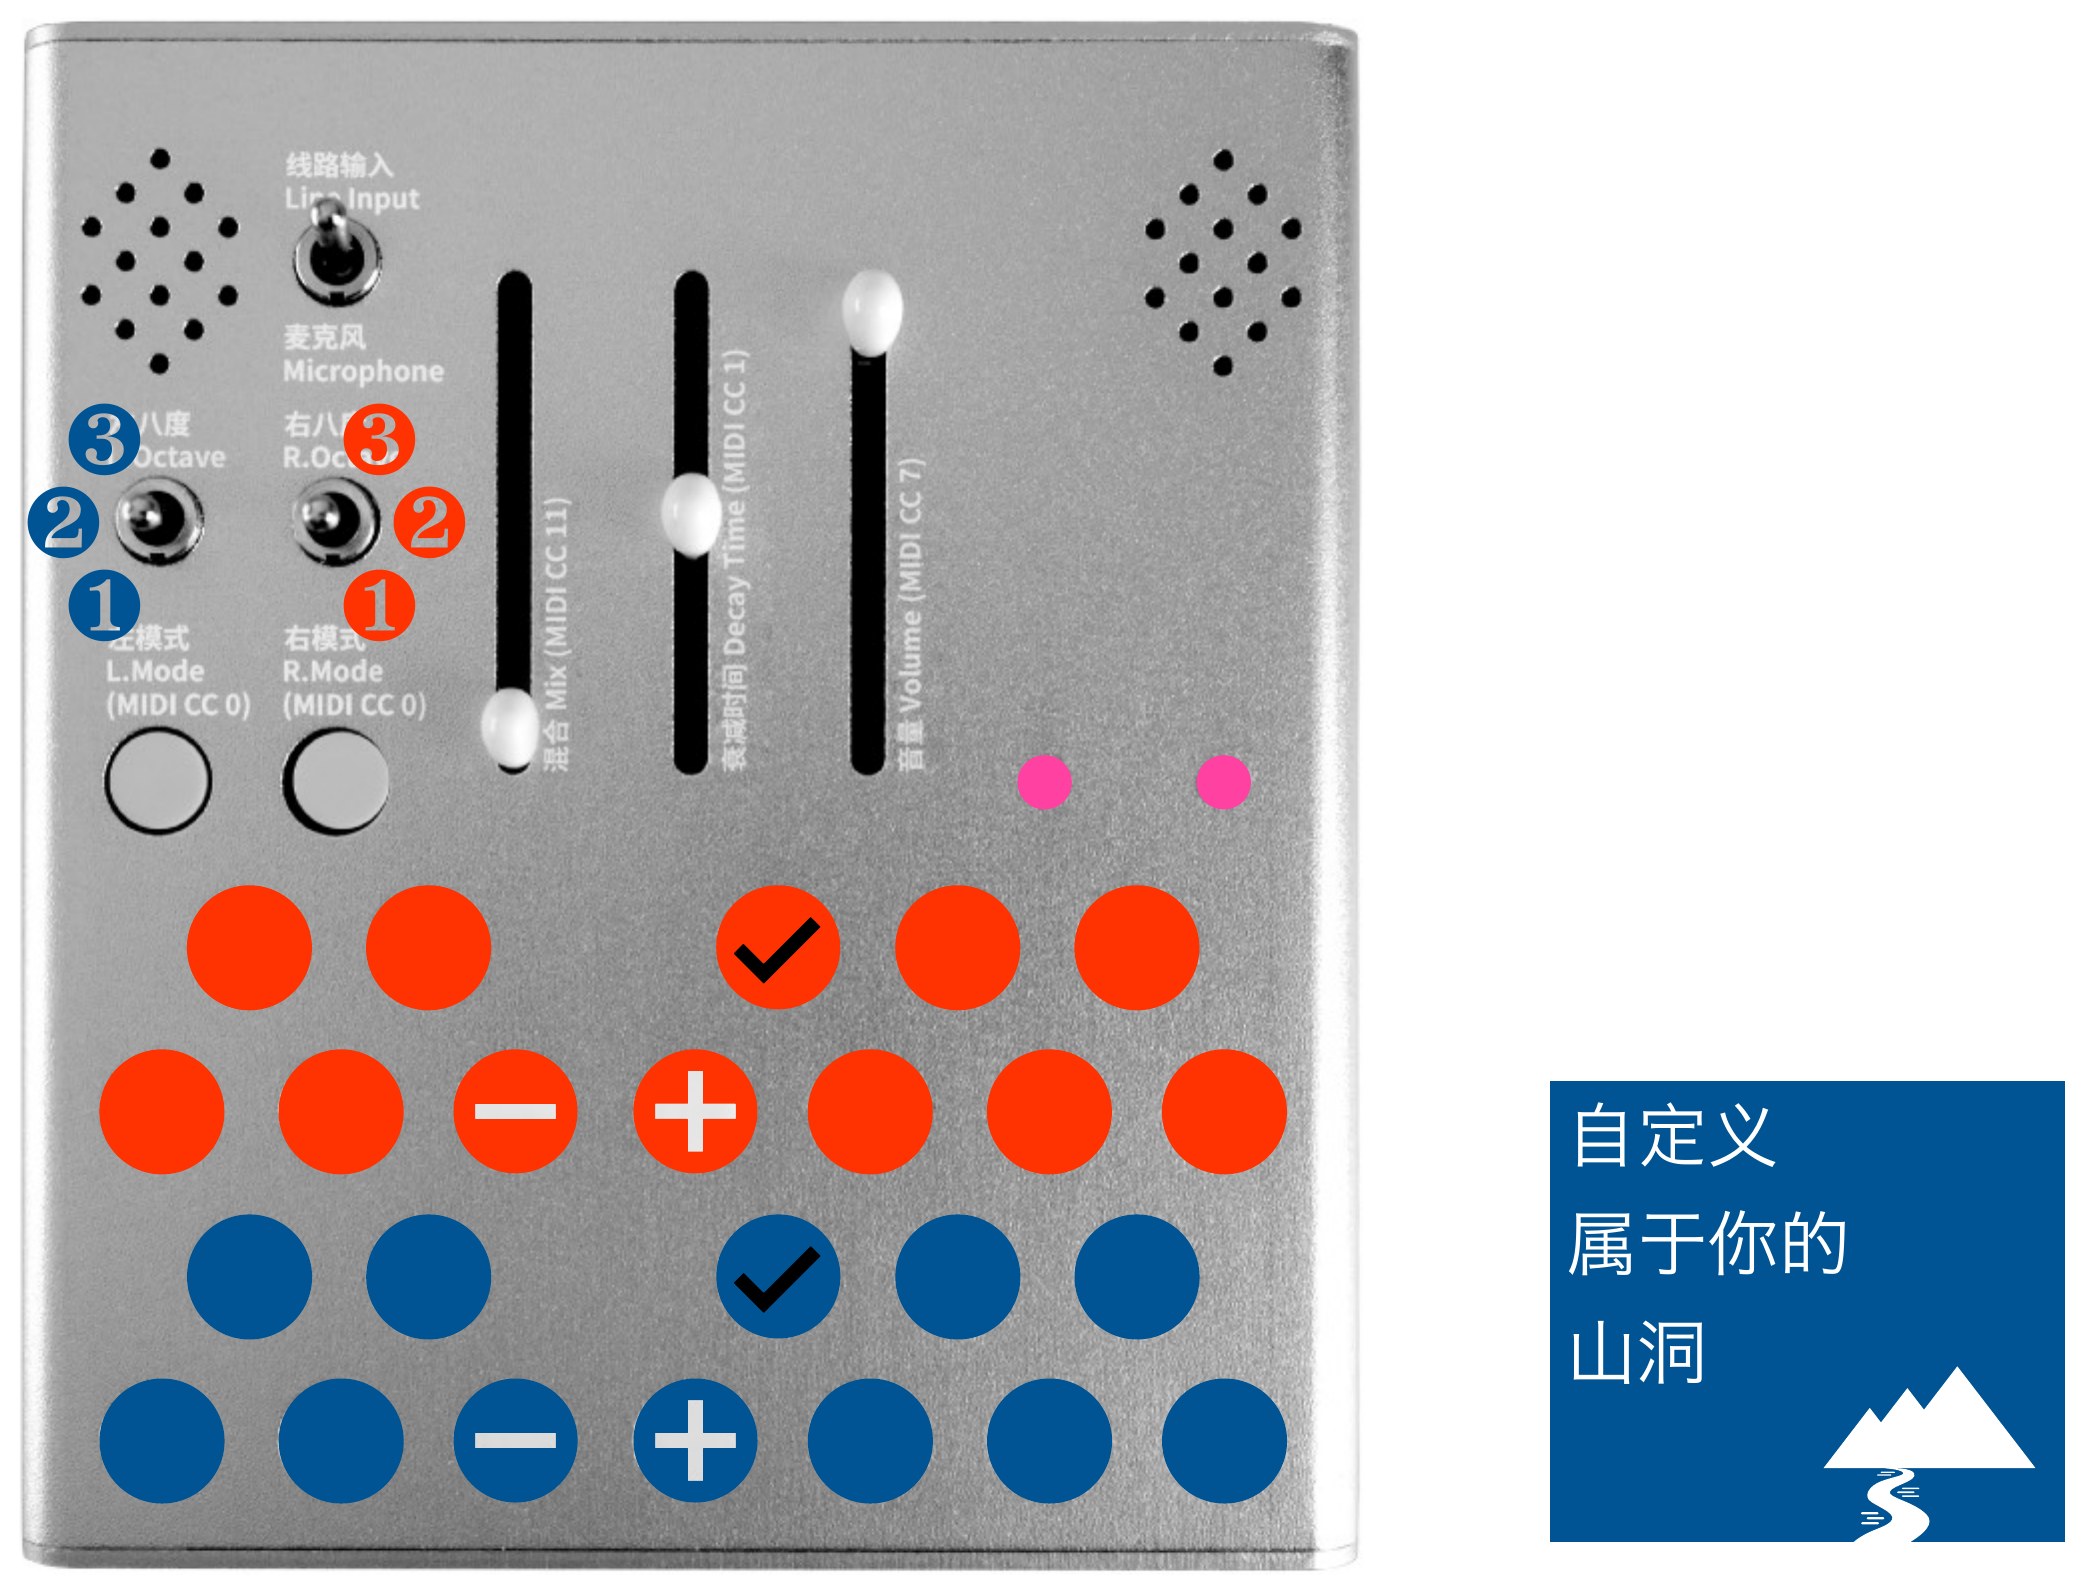
In Cave Mode, each channel has 9 resonators divided into three banks (Low/Mid/High). You can adjust each resonator's frequency and mute state individually.
Toggle mute / unmute
Increase the resonator's frequency
Decrease the resonator's frequency
Unmute all resonators
Mute all resonators
Left and right channels can be tuned separately
Frequency range 16.00–16000.00 Hz, resolution 0.01 Hz. Frequencies can be adjusted from the panel in Cave Mode, via MIDI CC (Chapter 13), or via USB Web Configuration.
6. Sequencer Threshold
In String and Bar modes, the sequence advances each time the input volume exceeds the threshold. The threshold can be set independently for left and right.
Right channel sequencer threshold
Left channel sequencer threshold
Setting on the panel: Hold the Mode button for the corresponding channel, then press a note button to select the threshold. The buttons are arranged chromatically from C to B, covering 12 steps—C is the lowest, B is the highest.
Thresholds can also be set via MIDI CC or USB Web Configuration (the "Input Threshold" fields).
7. Pre and Post Clip Gain
The clipper's pre-gain and post-gain can be adjusted independently:
Post gain: resonator volume
Pre gain: adjusts saturation
Setting on the panel: Hold the Mode button for the corresponding channel, then press a note button to select the gain. The buttons are arranged chromatically from C to B, covering 12 steps—C is the lowest, B is the highest.
Adjust the pre gain for the desired tone, then adjust the post gain for a comfortable dry/wet control response.
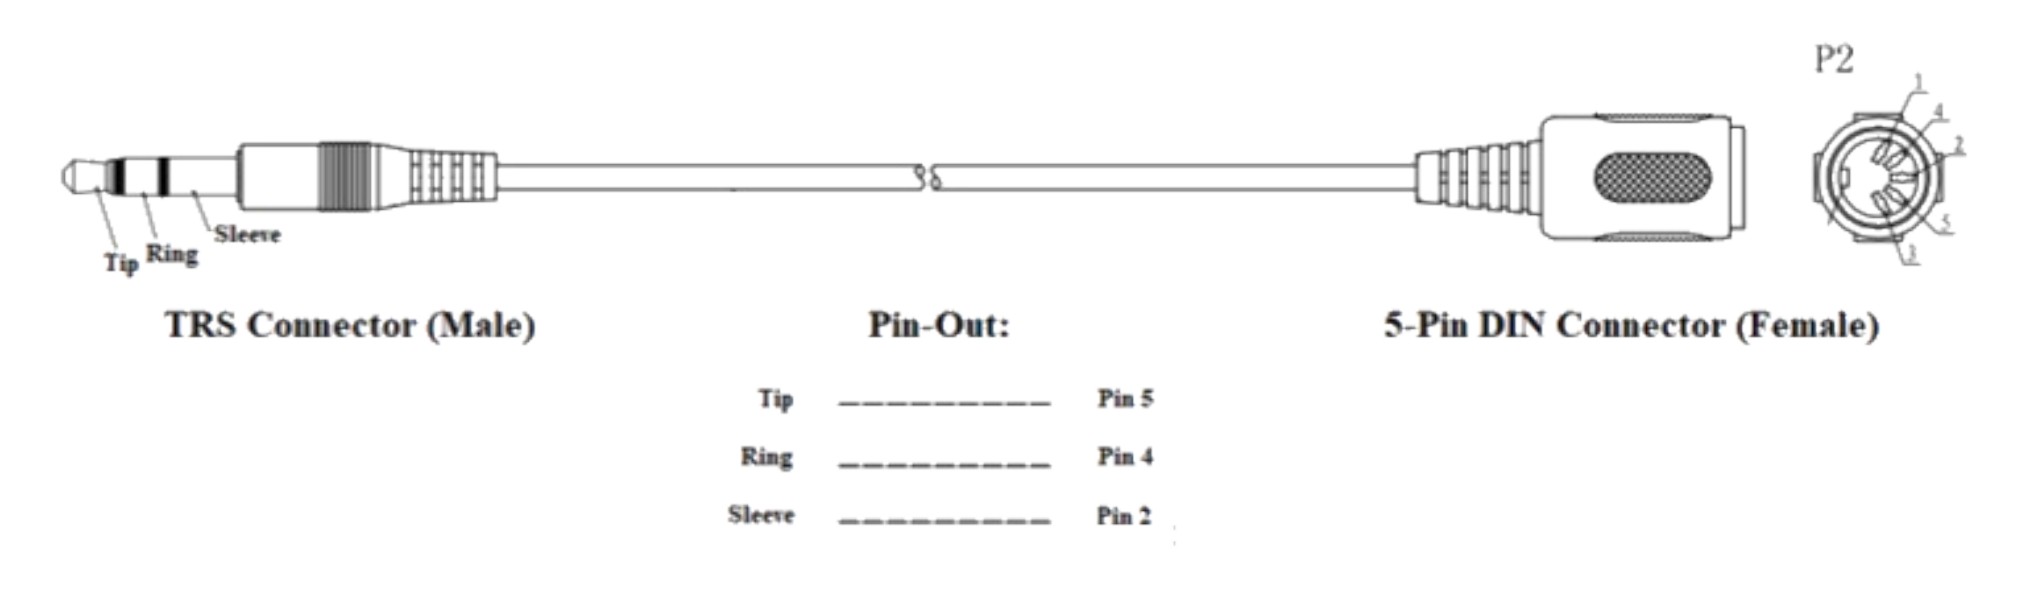
Wingie2 can be controlled via MIDI. The MIDI interface follows the MMA standard; use standard MIDI cables.
MIDI Channels
MIDI channel
Notes
Control messages (CC)
User-adjustable (factory default 1, 2, 3)
Controls left channel Controls right channel Alternates left/right
Controls left channel Controls right channel Controls both channels
Factory defaults: left = channel 1, right = channel 2, both = channel 3. These can be changed in USB Web Configuration or via MIDI CC (Chapter 13).
MIDI Notes
Wingie2 accepts Note On messages (velocity 0 is treated as Note Off).
The built-in sequencer only works with the onboard mini-keyboard; it has no effect under MIDI control.
Fast, wide-interval note jumps may produce loud sounds.
Control Messages (CC)
MIDI CC input overrides the corresponding fader setting; move the fader again to make the fader setting take effect.
Wingie2 accepts 14-bit MIDI messages.
CC 0 — Mode select (v4 five-way even split):
CC 0 value
Mode
0–25
Poly
26–51
String
52–76
Bar
77–102
Cave
103–127
Ratio
As of v4, CC 0 changed from the original four bands (0-31 / 32-63 / 64-95 / 96-127 + 127 as a single point) to a five-way even split. If you previously used fixed CC values to switch modes, re-check them against this table.
Fader CC:
CC
Function
CC 11 (MSB) / CC 43 (LSB)
Mix (dry/wet)
CC 1 (MSB) / CC 33 (LSB)
Decay time
CC 7 (MSB) / CC 39 (LSB)
Volume
9. USB Web Configuration
Open https://wingie.wingpinger.com and choose "Configuration" to modify and save all settings by connecting Wingie2 via USB in a browser. It needs no Wi-Fi, SoftAP, CDN, Node, or Python—only a Web Serial-capable browser.
Connecting
Use desktop Chrome or Edge (with Web Serial support), and open the page from an HTTPS origin. Safari, Firefox, mobile browsers, and insecure HTTP pages are not supported.
Close any software using Wingie2's serial port, such as Arduino Serial Monitor.
Click "Connect Wingie2" and select the corresponding USB serial port.
What You Can Edit
On connection, the page reads one complete device snapshot. You can modify the following; every valid edit takes effect on the running sound immediately, with no Apply step:
Shared settings: A3 frequency (358.08–521.91 Hz), Tuning (Standard + 8 alternate tunings), Pre/Post Clip Gain, three MIDI channel routes, MPE switch, line-input stereo/mono
Ratio Mode profile: 9 resonator ratios (grouped into three Voices), with "Copy Voice 1 to Voices 2 & 3" and factory-reset buttons
Caves: 3 banks per channel, each with 9 resonator frequencies and mute states
The page does not show Mix, Decay, or Volume—these are physical faders on the panel and are not written to flash.
Saving
Your settings are only written to flash (and thus retained after restart) when you click "Save to Flash" and confirm. Before that, all edits affect only the current running state.
Synchronization
If Wingie2's panel controls, MIDI, or other software change the device state, the page automatically syncs the changes during idle time. You can also click Refresh at any time to re-read immediately.
Embedding
If the page is placed in an iframe, the iframe needs allow="serial", and the server must allow the corresponding Permissions-Policy: serial=(self).
10. MPE Mode
MPE (MIDI Polyphonic Expression) lets an MPE-capable controller apply independent pitch bend to each note on Wingie2. In v4, MPE is controlled by a switch in USB Web Configuration, factory default off, with the state saved to flash.
Switch off — conventional routing
No zone exists. Channels 1–16 all follow the configurable conventional Left/Right/Both routing (factory defaults 1/2/3). Channel 13 tuning CC, Channel 14/15 Cave-frequency CC, and Channel 16 global-settings CC all remain usable.
Switch on — standard Lower Zone
One Lower Zone claims every channel: Manager = Channel 1, Member = Channels 2–16.
Note assignment: Each Note On is assigned to one engine side, alternating left/right in arrival order (the same free-running alternation as the conventional Both route). A side in Cave Mode is skipped; if both sides are in Cave Mode, the note is ignored.
Per-note pitch bend: Each Member channel's Pitch Bend affects only the notes currently owned by that channel; the Manager's (Channel 1) Pitch Bend and CC apply globally to all active MPE voices on both sides.
Bend range: Member defaults to ±48 semitones, Manager to ±2 semitones. Adjustable via RPN 0 (CC 6 sets semitones, CC 38 sets cents); a range received on any Member channel applies to all Members.
External alternate tuning: An MPE source can send Pitch Bend before each note's Note On to establish an initial microtonal offset. In this case, set Wingie2's internal tuning to "Standard" so the MPE source is the sole tuning authority; if an internal alternate tuning remains enabled, the internal intervals and the MPE offset are both applied.
With MPE on, the conventional Left/Right/Both routes no longer apply, and the Channel 13–16 control CCs are taken over by the zone (use per-note Pitch Bend for tuning, and USB Web Configuration for Caves and global settings).
Per-Note Pressure Expression (0xD0 + CC 74)
With MPE on, Member-channel pressure expression increases the decay time: the harder the press, the longer the tail. Channel Pressure (0xD0) and CC 74 each cover half of the travel (+2s per note in total, +6s in single-note modes); the two segments join into one 0–254 travel axis, mapped linearly. This matches Osmose-class controllers.
In Poly / Ratio each note adds up to 2s on top of the Decay fader (up to 6s extra per side); String and Bar are single-note modes, where the single note adds up to 6s, easing back as the key lifts. The sum can go past the fader ceiling (with the Decay fader at its 10s maximum, the sum can reach 16s). Outside MPE mode, Channel Pressure and CC 74 on a routed channel apply to that side as a whole (up to 6s). A controller that sends only 0xD0 or only CC 74 can use half of the travel.
Other MPE Member CCs are not mapped to any parameter. Both zones of a dual-zone controller merge into Wingie2's single zone.
Open https://wingie.wingpinger.com and choose "Firmware Installer" to install or upgrade Wingie2 firmware. The flasher connects directly to the ESP32 ROM bootloader, so it works with blank flash, upgrades from older versions, and devices with corrupted app firmware but a healthy bootloader.
Steps
Open the page from an HTTPS address in desktop Chrome/Edge. Connect Wingie2 with a data-capable USB cable.
Close the configuration page, Arduino Serial Monitor, DAW/MIDI tools, and any other software using the serial port.
Click "Connect Wingie2" and select Wingie2's USB serial port.
Once "Device connected" appears, click "Install firmware". Do not unplug USB or close the page during installation.
When "Installation complete" appears, Wingie2 is ready to use.
Safety Boundaries
The standard flash writes only four fixed regions (bootloader, partition table, boot_app0, and the app firmware). It does not perform a full-chip erase, does not read app0, and does not write the NVS region starting at 0x9000. This means your MIDI channels, tuning, Caves, and Ratio settings are all preserved after a standard flash.
Factory reset or erasing configuration is not part of this page's standard flow.
Troubleshooting
Port in use: Close other configuration pages, Serial Monitor, DAW/MIDI tools and retry.
No serial port found: Try a different data-capable USB cable and port; install the USB serial driver required by your device.
Cannot enter bootloader: Let the page switch automatically first; if it still fails, hold BOOT, briefly press RESET/EN, and release BOOT after connecting begins.
Wrong chip: Do not continue; this release only supports the original ESP32, not ESP32-S2/S3/C3.
Write failure: Do not unplug; retry the current install first; if it repeatedly fails, change the USB cable or port.
12. Alternate Tunings
By default, Wingie2 uses standard western tuning (equal temperament).
As of version 3.1, eight additional tunings are provided (other tunings can be implemented by modifying the source code):
Centaur (Kraig Grady)
Harp of New Albion (Terry Riley)
Carlos Harmonic (Wendy Carlos)
Well-Tuned Piano (La Monte Young)
Meta Slendro (Grady/Wilson)
Bihexany (Gene Ward Smith)
Hexachordal Dodecaphonic (Paul Erlich)
Augmented[12] (Mike Smith, Paul Erlich)
There are three ways to enable an alternate tuning:
Hold the left Mode button when starting the device (fader positions determine the tuning; see the table below).
Use MIDI (Channel 13, CC 23, values 0–8; see the table below). The advantage is that no restart is needed; the tuning can be changed on the fly.
Use USB Web Configuration: Select Standard or one of the eight alternate tunings in the "Tuning" dropdown under shared settings. This also requires no restart.
Alternate tuning also affects Cave Mode (see Chapter 15) and honors the Global Tuning (A3) setting.
Switching tuning at startup
Hold down the left Mode button before plugging in the USB cable. The fader positions determine the tuning:
Left Mode button
Right Mode button
Left fader
Middle fader
Right fader
Tuning
Released
Held
—
—
—
Equal temperament
Held
Released
Bottom
Bottom
Bottom
Centaur
Held
Released
Bottom
Bottom
Top
Harp of New Albion
Held
Released
Bottom
Top
Bottom
Carlos Harmonic
Held
Released
Bottom
Top
Top
Well Tuned Piano
Held
Released
Top
Bottom
Bottom
Meta Slendro
Held
Released
Top
Bottom
Top
Bihexany
Held
Released
Top
Top
Bottom
Hexachordal Dodecaphonic
Held
Released
Top
Top
Top
Augmented[12]
For more information on tuning, see wingie_tuning_notes.pdf.
Switching tuning via MIDI
Channel
CC
Value
Tuning
13
23
0
Equal temperament
1
Centaur
2
Harp of New Albion
3
Carlos Harmonic
4
Well Tuned Piano
5
Meta Slendro
6
Bihexany
7
Hexachordal Dodecaphonic
8
Augmented[12]
A TouchOSC template by Dave Seidel: wingie_tuning.tosc.
13. Global Settings (MIDI CC Table)
MIDI channels, global tuning, alternate tuning, and Cave Mode resonator frequencies can be set via the MIDI global-settings channel (Channel 16), or via USB Web Configuration.
Large frequency jumps can cause loud sounds; lower the volume and decay time before adjusting.
MIDI channel
MIDI controller
Function
Factory default
16
20
Left channel MIDI route
1
21
Right channel MIDI route
2
22
Both-channel MIDI route
3
23 (MSB) / 55 (LSB)
Global tuning (centered on 440 Hz, range ±81.92 Hz, resolution 0.01 Hz)
There are two ways to write current settings to flash so they persist after restart:
Panel dual-button save: Hold both Mode buttons simultaneously for three seconds. During the countdown, the LED cycles through the four colors and flashes when the countdown ends to indicate completion. This operation may cause a brief noise and is not recommended during recording or live performance.
Saved settings include: A3 frequency, tuning, Pre/Post Clip Gain, three MIDI channel routes, left/right Mode and Input Threshold, the shared Ratio profile, all three Cave banks per channel (frequencies and mute), the MPE switch, and line-input stereo/mono. Toggling line mono by holding both C keys at startup writes flash immediately and does not require the dual-button save.
15. Caves Mode and Alternate Tunings
When you enable an alternate tuning, the caves are also tuned to match the selected tuning.
To accommodate all 12 pitches, the caves are arranged so that the left channel uses the even-numbered scale tones, covering one and one-third octaves:
C, D, E, F#, G#, A#, C', D', E'
The right channel uses the odd-numbered scale tones, also covering one and one-third octaves:
C#, D#, F, G, A, B, C#', D#', F'
The three banks (Low/Mid/High) are switched with the octave buttons, similar to Poly, String, and Bar modes. However, the left and right caves are always in the same bank, so all scale pitches are covered across both sides.
Dave Seidel wrote Wingie2's alternate tuning feature.
16. Tips
Play Wingie2 as a percussion instrument;
Take Wingie2 outdoors and play with environmental sounds;
Play together with acoustic instruments;
Build feedback with a speaker;
Build feedback with effects;
Use a drum machine to trigger the sequencer with drum hits and obtain melodies;
In live performance, use an external cardioid mic and line input to avoid feedback;
Use Ratio Mode to explore non-octave resonant relationships;
Use an MPE controller for independent per-note pitch bend, pressure expression, and microtuning;
Use the web configuration page to adjust Cave frequencies and ratios in real time without restarting.
… (more for you to discover)
Thanks to Roy Parvin for writing the English introduction and proofreading the manual, to Anqi for the inscription on the back of Wingie2, and to Dave Seidel for writing the alternate tuning feature.
Where to find me
Website: mengqimusic.com
Bilibili: space.bilibili.com/4485929
Weibo: weibo.com/mengqimusic
Instagram: instagram.com/mengqimusic
17. Version Notes
Changes in v4.30 compared to v4.20:
Pressure expression now has Channel Pressure (0xD0) and CC 74 each covering half of the travel (+2s per note in total, +6s in single-note modes), matching Osmose-class controllers. Outside MPE mode, Channel Pressure and CC 74 on routed channels still apply to the side as a whole. The response curve is now linear instead of exponential.
Changes in v4.20 compared to v4.10:
MPE channel-pressure expression: with MPE on, each note's Channel Pressure (0xD0) lengthens decay: the harder the press, the longer the tail. In Poly / Ratio each note adds up to 2s on top of the Decay fader (up to 6s per side); String and Bar can add up to 6s for the single note, easing back as the key lifts. The sum can go past the fader's ceiling (with the fader at 10s, the sum can reach 16s). Outside MPE, Channel Pressure on a routed channel applies to that side as a whole (up to 6s).
Changes in v4.10 compared to v4.03:
Adds a mono line-input mode: in this mode, the left and right line-input channels are mixed together and fed into both resonators, for use with a mono source. Hold both left and right C keys at startup to toggle the mode and store it, or set it on the configuration page. This setting does not affect the built-in microphone.
Changes in v4.03 compared to v4.02:
Unsaved-change warning on the configuration page: the status line and Save button turn red while changes have not been written to flash, restoring after a confirmed save.
Save-failure LED: the two-button save flashes the LED red on failure (white on success), with failure details on serial.
An earlier build put MPE per-note pressure on the DSP hot path, watchdog-reset about 10 seconds after boot, and was withdrawn. This build uses the same audio core as v4.02 and does not include that path; 0xD0 is still received, but it does not change decay.
Changes in v4.01 compared to v4:
Ratio Mode LED indication adjusted: Changed from a fast four-color cycle to alternating white and yellow (switching every 0.5 seconds) for a gentler look.
Key changes in v4 compared to v3.1:
New Ratio Mode: A fifth resonator mode with custom adjustable ratios, 3-voice polyphony, with independently adjustable frequency ratios per voice.
New USB Web Configuration: Modify and save all settings in real time via Chrome/Edge over USB.
New MPE Mode: Optional MIDI Polyphonic Expression with per-note pitch bend and external alternate tuning.
New USB Web Flasher: One-click firmware install/upgrade in the browser; the standard flow preserves all settings.
New anti-feedback function: Feedback can still build up, but distortion is greatly reduced, yielding a softer tone.
Improved Cave frequency precision: Upgraded from integers to 0.01 Hz resolution.
Third way to enable alternate tuning: In addition to the startup button and MIDI, alternate tuning can now be switched via web configuration.
CC 0 mode segmentation changed to a five-way even split: 0-25 / 26-51 / 52-76 / 77-102 / 103-127 (previously four bands + 127 as a single point; see Chapter 8).